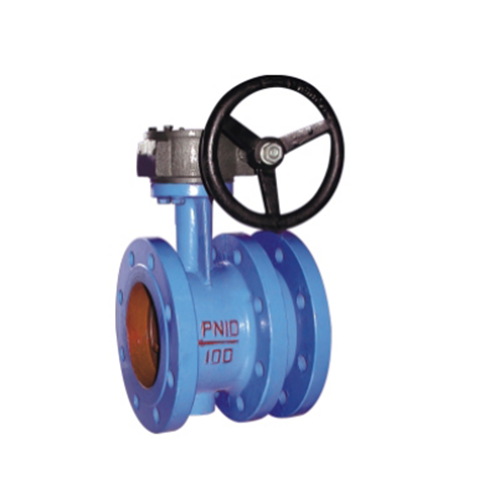
How to Lubricate and Maintain Stop Valve Stems
Introduction
Stop valves, also known as isolation valves, are essential components in plumbing, heating, and industrial systems. They control the flow of liquids or gases and must operate smoothly to prevent leaks and ensure safety. One of the most critical maintenance tasks for stop valves is lubricating and maintaining their stems, which are responsible for opening and closing the valve. Over time, stems can become stiff, corroded, or damaged, leading to operational failures.
Proper lubrication and maintenance of valve stems extend their lifespan, improve performance, and prevent costly repairs. This guide provides a detailed, step-by-step approach to lubricating and maintaining stop valve stems effectively.
---
1. Understanding Stop Valve Stems
Before performing maintenance, it’s essential to understand the structure and function of valve stems.
1.1 Types of Stop Valve Stems
- Rising Stem: The stem moves upward when the valve is opened and downward when closed. Common in gate and Globe valves.
- Non-Rising Stem: The stem rotates but does not move vertically. Often found in ball and butterfly valves.
- Screw Stem: Operates via a threaded mechanism, requiring lubrication to reduce friction.
1.2 Common Issues with Valve Stems
- Corrosion: Exposure to moisture and chemicals can cause rust.
- Friction & Wear: Lack of lubrication leads to stiffness and difficulty in operation.
- Dirt & Debris Accumulation: Particles can jam the stem mechanism.
- Seal Degradation: Worn-out packing or O-rings cause leaks.
---
2. Tools and Materials Needed
Before starting, gather the following:
- Lubricant: Silicone-based grease, PTFE (Teflon) grease, or valve-specific lubricant.
- Cleaning Supplies: Wire brush, soft cloth, solvent (isopropyl alcohol or WD-40).
- Wrenches & Pliers: Adjustable wrench, pipe wrench (if disassembly is needed).
- Replacement Parts: Packing material, O-rings, gaskets (if seals are damaged).
- Safety Gear: Gloves, goggles, and protective clothing.
---
3. Step-by-Step Lubrication and Maintenance Process
3.1 Preparation
1. Turn Off the System: Ensure the valve is closed and the system is depressurized.
2. Drain Residual Pressure: Open a downstream faucet or vent to release trapped fluid.
3. Clean the Exterior: Remove dirt and grime from the valve body using a brush and solvent.
3.2 Disassembling the Valve (If Necessary)
Some valves require partial disassembly for proper lubrication:
1. Remove the Handwheel or Handle: Use a wrench to loosen the nut securing it.
2. Unscrew the Packing Nut: This exposes the stem and packing material.
3. Extract the Stem: Carefully pull the stem out, noting its orientation.
3.3 Cleaning the Stem
1. Inspect for Damage: Check for corrosion, pitting, or bending.
2. Remove Rust & Debris: Use a wire brush or fine sandpaper (if corrosion is minor).
3. Clean with Solvent: Wipe the stem with alcohol or a degreaser to remove old lubricant.
3.4 Lubricating the Stem
1. Apply Lubricant: Use a silicone-based or PTFE grease for smooth operation.
- For screw stems: Apply grease along the threads.
- For rising stems: Coat the entire stem surface.
2. Reinstall the Stem: Insert it back carefully, ensuring proper alignment.
3. Tighten the Packing Nut: Adjust to allow smooth movement without excessive play.
3.5 Reassembling the Valve
1. Replace Worn Seals: If packing material or O-rings are damaged, install new ones.
2. Reattach the Handwheel: Secure it firmly but avoid over-tightening.
3. Test Operation: Open and close the valve several times to ensure smooth movement.
---
4. Preventive Maintenance Tips
To minimize future issues:
- Regular Inspection: Check valves periodically for leaks or stiffness.
- Re-lubrication Schedule: Lubricate stems every 6-12 months, depending on usage.
- Protect from Corrosion: Apply anti-corrosion sprays in humid environments.
- Avoid Over-Tightening: Excessive force can damage the stem or packing.
---
5. Troubleshooting Common Problems
- Stiff Valve: If lubrication doesn’t help, the stem may be bent or corroded beyond repair.
- Leaking Stem: Tighten the packing nut slightly or replace the packing material.
- Stripped Threads: If the stem won’t turn smoothly, threads may be worn—replace the stem or valve.
---
6. Safety Considerations
- Always depressurize the system before maintenance.
- Use appropriate PPE (gloves, goggles) when handling chemicals.
- If unsure about disassembly, consult a professional.
---
Conclusion
Proper lubrication and maintenance of stop valve stems ensure smooth operation, prevent leaks, and extend valve lifespan. By following these steps—cleaning, inspecting, lubricating, and reassembling—you can keep valves functioning optimally. Regular preventive maintenance reduces downtime and costly repairs, making it a crucial practice for any plumbing or industrial system.
By adhering to this guide, you can maintain stop valve stems efficiently, ensuring reliable performance in any application.
This website uses cookies to ensure you get the best experience on our website.
Comment
(0)