
Gate Valve Installation Mistakes to Avoid
Introduction
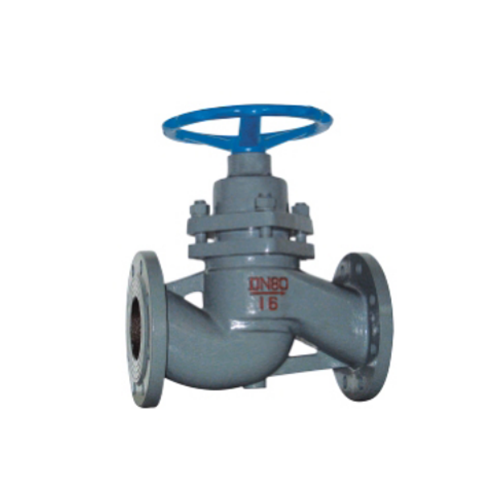
Gate valves are essential components in various piping systems, used primarily for isolating fluid flow rather than regulating it. Proper installation is crucial to ensure their longevity, efficiency, and safety. However, many common mistakes during installation can lead to leaks, valve failure, or even system damage.
This guide outlines the most frequent gate valve installation errors and provides best practices to avoid them. By following these recommendations, engineers, plumbers, and maintenance personnel can ensure smooth operation and prevent costly repairs.
---
1. Incorrect Valve Orientation
Mistake: Installing the Valve Upside Down or Sideways
Gate valves must be installed in the correct orientation to function properly. Installing them upside down or sideways can cause improper seating of the gate, leading to leaks or difficulty in operation.
Solution: Follow Manufacturer Guidelines
- Always check the valve body for flow direction indicators (usually an arrow).
- Ensure the stem is vertical or at least not inverted to prevent debris accumulation inside the valve.
- If the valve has a rising stem, confirm that there is enough clearance for the stem to extend fully.
---
2. Improper Support and Alignment
Mistake: Poor Pipe Support Leading to Stress on the Valve
If the piping system is not properly supported, excessive stress can be transferred to the valve, causing misalignment, leaks, or even cracking.
Solution: Use Adequate Pipe Supports
- Install pipe hangers or supports near the valve to prevent excessive weight or bending forces.
- Ensure proper alignment before tightening connections to avoid strain on the valve body.
- Use flexible couplings if necessary to accommodate thermal expansion or vibration.
---
3. Over-Tightening or Under-Tightening Connections
Mistake: Excessive Torque on Bolts or Flanges
Over-tightening can damage the valve seat, warp flanges, or crack the valve body. Under-tightening, on the other hand, can result in leaks.
Solution: Use Proper Torque Specifications
- Follow the manufacturer’s recommended torque values for bolts and nuts.
- Use a calibrated torque wrench instead of relying on guesswork.
- Tighten bolts in a crisscross pattern to ensure even pressure distribution.
---
4. Ignoring Gasket and Seal Installation
Mistake: Using Damaged or Incorrect Gaskets
A damaged or improperly sized gasket can cause leaks. Similarly, reusing old gaskets or using incompatible materials can lead to failure.
Solution: Inspect and Replace Gaskets Properly
- Always use new gaskets that match the valve’s specifications (material, size, and pressure rating).
- Ensure gasket surfaces are clean and free of debris before installation.
- Apply appropriate sealants if required, but avoid excessive use that could clog the valve.
---
5. Incorrect Handling of Rising Stem vs. Non-Rising Stem Valves
Mistake: Confusing Rising Stem and Non-Rising Stem Designs
Rising stem gate valves require vertical space for the stem to extend, while non-rising stem valves do not. Installing a rising stem valve in a confined space can prevent proper operation.
Solution: Choose the Right Valve for the Space
- Verify the valve type before installation.
- Ensure sufficient overhead clearance for rising stem valves.
- For underground or tight spaces, consider non-rising stem valves.
---
6. Failure to Lubricate Moving Parts
Mistake: Dry Operation Leading to Increased Friction
Gate valves rely on smooth movement of the gate and stem. Lack of lubrication can cause stiffness, corrosion, or even seizing.
Solution: Apply Proper Lubrication
- Use manufacturer-recommended lubricants on the stem and gate surfaces.
- Periodically inspect and reapply lubrication during maintenance.
- Avoid petroleum-based lubricants if the valve handles potable water.
---
7. Neglecting Pressure and Temperature Ratings
Mistake: Installing a Valve with Incorrect Pressure/Temperature Ratings
Using a valve rated for lower pressure or temperature than the system requires can lead to catastrophic failure.
Solution: Match Valve Specifications to System Requirements
- Confirm the valve’s pressure class (e.g., ANSI 150, 300) matches the system.
- Check temperature compatibility, especially for steam or high-temperature fluids.
- Never exceed the valve’s rated limits.
---
8. Skipping Pre-Installation Inspection
Mistake: Installing a Valve Without Checking for Defects
Damaged or defective valves can fail immediately upon installation, leading to leaks or operational issues.
Solution: Conduct a Thorough Inspection
- Check for cracks, corrosion, or manufacturing defects.
- Verify that the gate moves freely before installation.
- Ensure all components (bolts, gaskets, seals) are present and undamaged.
---
9. Improper Use of Thread Sealants
Mistake: Over-Applying or Using Wrong Sealants
Excessive thread sealant can enter the valve and obstruct flow, while insufficient sealant may not prevent leaks.
Solution: Apply Sealant Correctly
- Use PTFE tape or pipe dope suitable for the valve material and fluid type.
- Wrap tape clockwise (for right-hand threads) and avoid covering the first thread.
- For threaded connections, ensure a snug fit without over-tightening.
---
10. Ignoring System Flushing Before Installation
Mistake: Installing a Valve in a Dirty Pipeline
Debris, welding slag, or rust inside the pipe can damage the valve seat or obstruct movement.
Solution: Flush the System Before Installation
- Clean and flush pipelines to remove contaminants.
- Install temporary strainers if necessary to catch debris.
- Avoid installing valves near areas with high sediment buildup.
---
11. Incorrect Actuator or Handwheel Installation
Mistake: Misaligning Actuators or Handwheels
Improperly mounted actuators or handwheels can make operation difficult or cause mechanical stress.
Solution: Ensure Proper Alignment
- Follow manufacturer instructions for actuator mounting.
- Ensure handwheels are accessible and not obstructed.
- For automated valves, verify electrical or pneumatic connections are secure.
---
12. Failure to Perform Post-Installation Testing
Mistake: Assuming the Valve Works Without Testing
Leaks or operational issues may not be apparent until the system is pressurized.
Solution: Conduct Pressure and Leak Tests
- Perform a hydrostatic test to check for leaks.
- Cycle the valve multiple times to ensure smooth operation.
- Monitor for unusual noises or resistance during operation.
---
Conclusion
Proper gate valve installation is critical for system reliability and safety. By avoiding these common mistakes—such as incorrect orientation, poor support, improper torque, and neglecting lubrication—installers can ensure optimal performance and longevity.
Always refer to manufacturer guidelines, use the correct tools, and conduct thorough inspections before and after installation. Following these best practices will minimize downtime, reduce maintenance costs, and enhance the efficiency of piping systems.
By paying attention to these details, professionals can prevent costly errors and ensure that gate valves function as intended for years to come.
This website uses cookies to ensure you get the best experience on our website.


 Phone
Phone
Comment
(0)